
- What is compost?
- What can be composted?
- How to mix the components correctly?
- What should not be put in the composter?
- 3 problems with composting and how to solve them.
- How to compost quickly? Activators, accelerators and biodegradants.
- Live helpers for lazy gardeners: compost Vermiculture.
- How to properly breed earthworms?
- General overview of garden composters.
- Small DIY compost box.
- Which garden composter to select?
- 10 rules of how to make good quality compost.
1. What is compost?
Compost is an organic matter produced by the decomposition and decay of organic waste in a special compost pit or compost bin. This process is called composting and must take place under special conditions with sufficient air exchange and the presence of heat. Only then will anaerobic bacteria form inside it.
Compost is composed of organic compounds and is an excellent fertilizer.
The compost includes:
- nitrogen;
- carbon;
- oxygen;
- humidity.
The benefits of compost have been known since ancient Greece. Even then, compost was used as a fertilizer because it was rich in nutrients. Compost also conditions the soil and fights soil erosion.
2. What can be composted?
Compost requires components which can be divided into two groups: nitrogenous and carbonaceous organic matter. The first group includes, for example:
Nitrogen group:
- rests of food;
- manure, bird droppings;
- coffee grounds, tea leaves and the like.
Carbon group:
- tree bark, hay, sawdust, ash;
- paper;
- eggshells;
- leaves, branches, weeds;
- cardboard;
- natural fabrics
3. How to mix components correctly
If you overdo it with nitrogenous substances, they will begin to rot and emit an unbearable smell. If there is an excess of carbon, the compost will be dry, which will take longer to decompose. Therefore, it is necessary to correctly calculate the number of components and use compost rotting accelerators. To simplify the count, you need to remember the rule:
1 nitrogen + 2 carbon parts
In addition, there is a rule for stacking the ingredients. It is not necessary to press the substances, since this disrupts air circulation and contributes to the death of bacteria, after which the mixture usually becomes unusable.
To increase the nutritional value of the compound, wood ash, bones, fish meal, eggshells can be added.
To form oxygen, the contents must be constantly mixed. It is essential to ensure that the walls of the composter allow the passage of air. Compost must be constantly moistened. If it is dry, it should be watered periodically with a hose. All constituent residues rot gradually, as heat is released as a result of the vital activity of microorganisms. In the first months, microbiological activity leads to the heating of the compost to 60–70° C, while the organic material is neutralized. At this stage, the contents of the composter need additional moisture.
4. What should not be put in the composter?
First of all, let’s tackle food waste. For example, meat, fish and bones can not be composted in a composter. When rotting, they will emit a very strong smell, besides they will attract the attention of rodents. Dairy products are not much suitable, and it makes no sense to add oils and fats. In addition, you can not add spices and citrus peel to the compost, bacteria and worms don’t like them much. Seeds, fruit kernels and weeds with seeds should be avoided as they can germinate.
As for non-food waste, it is worth clarifying that you can not add:
- glossy magazines;
- diseased plants;
- feces of dogs and cats.
Separately, it should be noted that biodegradable plastic is also not suitable. Of course, it will decompose over time, but it will take a long time and there will be no benefit to the compost.

5. 3 problems with composting and how to solve them
1) Your compost has a strong smell of rotten eggs or ammonia. In the first case, mix the composition more often, most likely the water stagnates in the composter and there is not enough oxygen. In the case of ammonia, the problem is a large amount of organic nitrogen, add more carbon components.
2) Animals and insects are “interested” in your compost. Make sure you haven’t added prohibited food waste to your compost. And if you decide to add them to the compost, it is better to bury them deeper in the compost so that no one reaches and smells them.
3) The compost has not warmed up. The correct compost must be warm, since it is the release of heat that indicates the proper growth of microorganisms in it. There may be a number of reasons for “cold” compost: lack of oxygen, moisture or nitrogen. Check if there is enough water and if the compost can “breathe” enough. In addition, the reason may be a compost pit or a compost bin that is too large or too small.
6. How to compost quickly? Activators, accelerators, and bio-degradants
To avoid reinventing the wheel, of course, the easiest way is to use commercial composting accelerators. They are reliable, proven and inexpensive.
But if you prefer to do it yourself and not to buy, in this article we have collected popular “recipes” to accelerate the rotting of compost.
Recipe 1 – Jam and yeast:
- Pour a half-liter jar of old jam into a bucket of water
- Add a glass and a half of sugar.
- Dissolve 300 g of yeast.
- Let it brew for 6-7 days.
- Pour into a compost bin
In addition, to accelerate the maturation of the compost with yeast, you need to feed it with sugar so that it begins to grow, then pour it into the composter. The temperature must be above 18 degrees, otherwise the yeast will not work. You can also use brewer’s yeast.
Recipe 2 – Rice water and milk:
- 3 tablespoons of rice, pour a glass of water, soak for a while.
- Drain the water into a separate container and let it brew for a week in a warm, dark place.
- After fermentation, add 2.5 liters of milk and let stand for another week.
- Strain the resulting mass and add a tablespoon of sugar.
- Pour the resulting liquid into a composter.
Recipe 3 –with curdled milk:
- Dissolve half a packet of dry yeast or a package of ordinary yeast in a glass of warm water with sugar.
- Add a glass of curdled milk. In principle, any fermented milk product based on live bacteria will work.
- Pour the mixture into a compost bin
A few more tools that will accelerate the ripening of the compost.
Urea:
When the composter contains few nitrogen components, you can add urea:
- Dissolve 2 – 3 tablespoons of urea in a bucket of water.
Water the compost with it and mix well so that the liquid penetrates into all corners.
Manure:
Manure is a valuable nutritious product for soil, but it is dangerous to use it when fresh due to the release of methane, which burns the roots of plants. However, it is suitable for accelerating the decomposition of carbon components in the composter. Nitrogen in manure triggers the rotting reaction, in which the temperature rises rapidly.
But if the mixture is not ventilated in time, the amount of oxygen inside will decrease, and the microorganisms will die. To do this, you need to mix the contents or dig several compost pits and periodically transfer (every 5 to 20 days) the compost to other wells. Then you can harvest fertilizer 3 times per year since it is prepared in 1.5-2 months.
Manure is usually applied in the fall or spring, but anyway it is better to add it 2-3 weeks before using compost for planting.
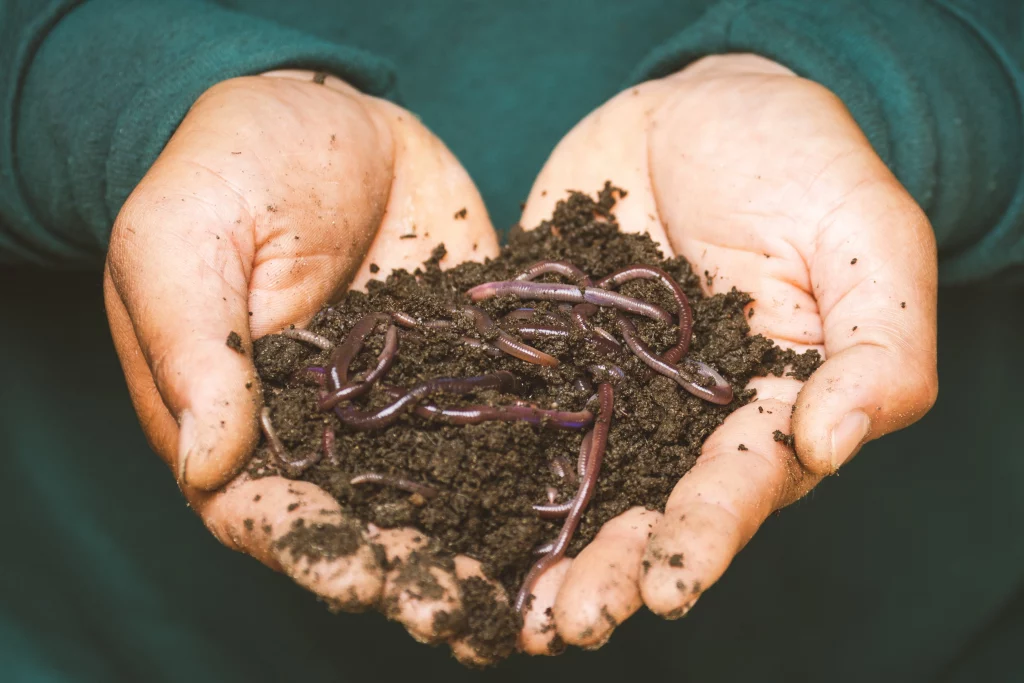
7. Live helpers for lazy gardeners: compost accelerators. Vermiculture
To efficiently use worms, it’s recommended to lay plant residues in small portions and let them be attacked by worms. In two weeks, everything will be eaten and adults will begin to starve.
Then a new portion of food is poured over the finished compost, and all the worms will attack the top layer. The lower one can already be used to feed the plants. For this, the composter must have a door at the bottom to remove ready-made fertilizer.
It is necessary to monitor the moisture content of ingredients since worms need liquid. The layers should not be compressed so that air is constantly available.
Bread scraps should not be added to the compost, as this can attract mice, hedgehogs and other animals that feed on earthworms.
The compound thus prepared must be mixed with the soil before using it, since its pH is very high and can harm plants that prefer slightly acidic or alkaline soils.
8. How to properly breed earthworms?
The only negative aspect of composting with earthworms is the need to maintain the correct temperature. The optimal is 19-20 degrees, in which the worms actively feed and reproduce. At very low and very high temperatures, they reduce activity and can die.
The composter should be placed in a place protected from sunlight and transferred to a warm room for the winter. With proper breeding, a colony of worms can give an increase in individuals of 100 kg, able to process 1 ton of plant residues. This produces about 600 kg of vermicompost. A worm eats as many substances a day as it weighs.
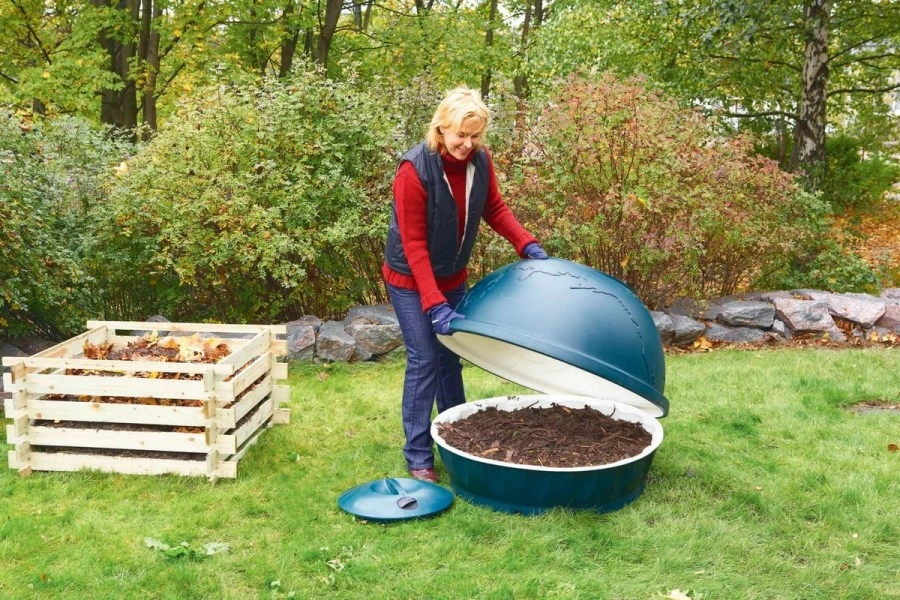
9. General overview of garden composters
Since ancient times, various wooden devices have been made for composting, and now they are available in various types, designs, and materials.
The simplest and cheapest option is a compost pit. It should be up to 1 m deep. Also, pay attention to how to moisturize and aerate the contents.
A common and simple option is a composter made from a barrel. To do this, you can use an unnecessary old barrel or purchase a modern version.
In commerce, there’s a variety of models for compost containers. For sure, they are more aesthetic and easy to use. Their capacity allows you to store up to 200 liters or more of valuable fertilizer. A simple and inexpensive option is suitable for a summer house. For year-round use, you can purchase a more expensive and practical/functional model.
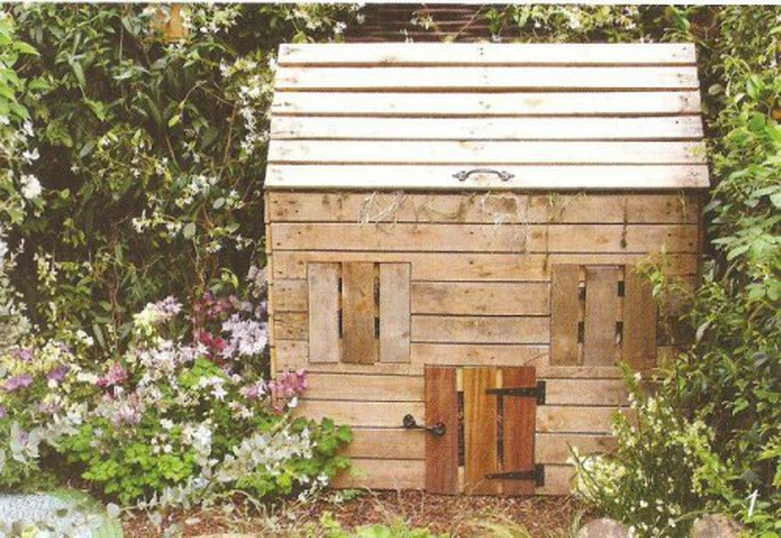
10. Small DIY composter
You can buy a ready-made composter or you can make a composer yourself. It will not take much time and will help you save money.
For example, you can make a wooden box. The dimensions can be different, for example, you can make a square with sides of about 1 meter.
You can also make them with unnecessary boards or screws. So it will not only be aesthetic, but also environmentally friendly.
To accumulate moisture, the bottom of the composter should be left earthy. At the bottom of the composter, you can lay large branches left after cutting the trees.
A simple option for a homemade composter can also be a metal mesh container.

11. Which garden composter can you buy?
There is a huge selection of plastic composters on the market. It is a highly durable material, which is resistant to sudden changes in temperature.
Such a composter is easy to use. It has a sealed bottom and a hatch with a lid. There are openings for ventilation. Waste is easily loaded and also easily removed from it. The fertilizers obtained are of good quality.
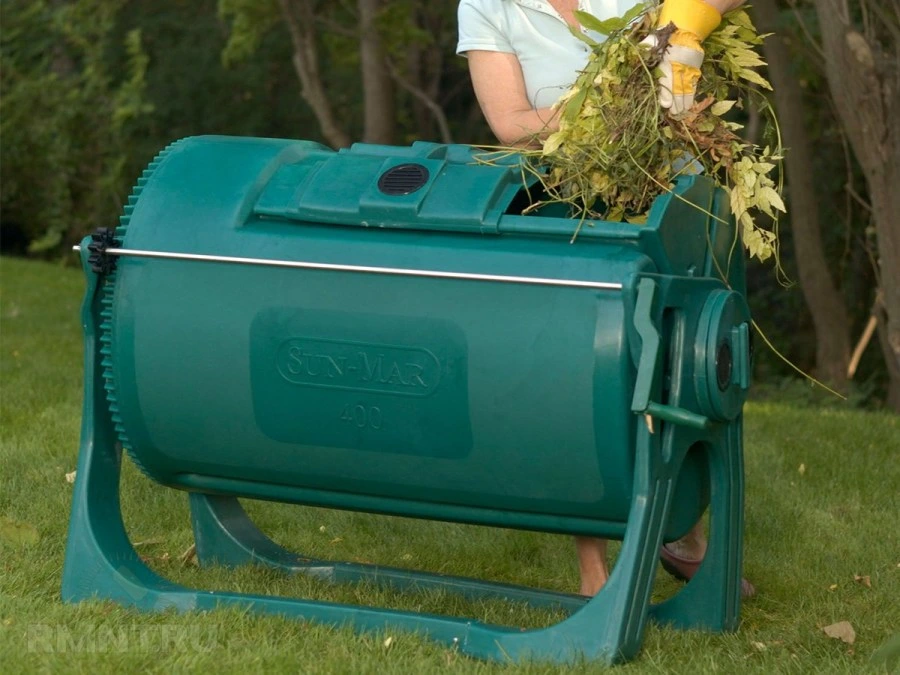
Containers with a horizontal rotating drum will allow you to mix wastes more evenly and provide for better aeration that is very important for ripening compost
Or you can also select a more sustainable version made of wood, for example. The material itself doesn’t influence the quality of compost (all depends on ingredients and correct “technology” or conditions of ripening), but wooden ones look very nice and natural in the garden.
For the selection of a composter, think about the volumes. If you intend to treat only food waste for a small household, it is better to purchase a product with a volume of 200 litres. For a large family and garden, a volume of 800 to 1000 litres is better.
Higher quality containers can have summer and winter modes.
By the way, do not forget, that according to sanitary standards, as a rule, stationary composters should be located at a distance of 20 m from water supply sources and 10 m from residential buildings. To be sure, check your local regulations!
Finally, a checklist for each and every smart gardener.
12. 10 rules to help you make a good quality compost
Rule #1: Start composting at any time of the year
Compost can be started at any time of the year, excluding cold days with frost. You can add layers of organic matter from the beginning of spring, as soon as it becomes available. Alternatively, you can start in the fall, when there is a lot of plant waste and fallen leaves.
Rule #2: Less light and more air
The compost area should be shaded and protected from the wind to prevent it from drying out. But a container without openings will not work as well due to poor airflow.
Rule No. 3: Best shape – Pyramid
It is most effective to create a compost pile in the form of a pyramid up to 1.5 m high, with walls on all sides. The pyramid tapers upwards, this will help the air flow inwards. Ventilation holes in the walls must be provided.
Rule #4: Almost all waste will work for composting
Put in the compost: potato skins, eggshells, leftover vegetables, spoiled fruits and vegetables, banana peels, tea leaves. All organic waste is suitable: herbs, manure, leaves, straw and sawdust.
You should not put the tops of tomato, potato plants, thrush, castor oil and broom in the compost mass; they contain poisonous substances that kill microorganisms involved in rotting.
To create a compost pile, you need to use a wide variety of organic materials: it must contain plant carbon and nitrogenous materials. You can also add some soil and ash.
Rule #5: Drainage is very important
At the bottom, it is necessary to lay pieces of branches that play the role of drainage. Before laying, each component of the compost must be crushed to speed up the process. Materials are laid in layers. The thickness of the layer should not be more than 30 cm, then it can be followed by a layer of soil up to 10 cm, then the organic wastes again. The more different organic substances are used, the better the quality of the finished product. On top, the compost mass is covered with dry grass or leaves. You can build a container for compost with two compartments. One will store last year’s compost and the second will be periodically replenished with biomaterials from the current season.
Rule #6: More humidity
Compost requires oxygen and moisture. In the absence of the required amount of air, the decay process will begin and it’s not good. To normalize air exchange, you need to mix it regularly. For active rotting, high humidity is required. The optimal moisture content for the normal activity of microorganisms is 60-70%. The lower the humidity, the slower the process of forming the compost mass. In the warm season, it is necessary to water the compost and with prolonged precipitation, it is good to cover it.
Rule #7: The hotter the better
For rotting, a special temperature is required. The cold in winter slows down the process of decomposition, while the heat in summer accelerates it. Primary processing inside the compost begins at a temperature of 60-70 ° C. This helps the thermal neutralization of organic matter: weed seeds are destroyed and some harmful microorganisms die. The next stage takes place at a temperature of 40 ° C, where organic waste is completely decomposed.
Rule No 8: Mixing
After composting, it is necessary to wait until the mass is mature. It must be mixed every few months, so that the internal temperature of the compost mass increases. This helps the enrichment with oxygen and the decomposition is accelerated.
Rule #9: Patience and More Patience
The quality of the final product depends on the duration of composting. Completely finished humus is formed in 1-2 years, fresh compost can be obtained in less than 12 months. With special activators – in a few months. At first, composting begins very actively, then slows down. The finished compost can be identified by several characteristics: it is crumbly, dark in color and smells of earth. The presence of unpleasant odors indicates the continuation of decay processes
Rule #10: A good compost should smell good
The finished mixture gives off a pleasant smell of earth and leaves. It can be sifted with a sieve. It is better to put the large pieces back in the compost pile. Ready humus is scattered in the garden and leveled with a rake: no need to dig. Or you can mix it with water and fertilize your garden with this solution.
We wish you to have a great and rich compost! If you have any good ideas/recommendations/secrets of how to do the best compost in the world – please, share them with our readers in comments! Thank you!


Add a comment